Basics of setting up a Jenkins multibranch pipeline job and defining a Jenkinsfile.
Creating Multibranch Pipeline Job
If you want to follow this article but don’t have a Jenkins instance at hand you can use my GitHub project to spin up a dockerized Jenkins:
git clone https://github.com/hoto/jenkinsfile-examples.git
cd jenkinsfile-examples
docker-compose pull
docker-compose up
Let’s open Jenkins by going to localhost:8080
There are already a couple of jobs there but ignore them as we will be creating a new job.
Creating new job
Click on New Item to open a job creation wizard.

Provide my-pipeline-job as the name for the job and select the Multibranch Pipeline as the type then click OK.
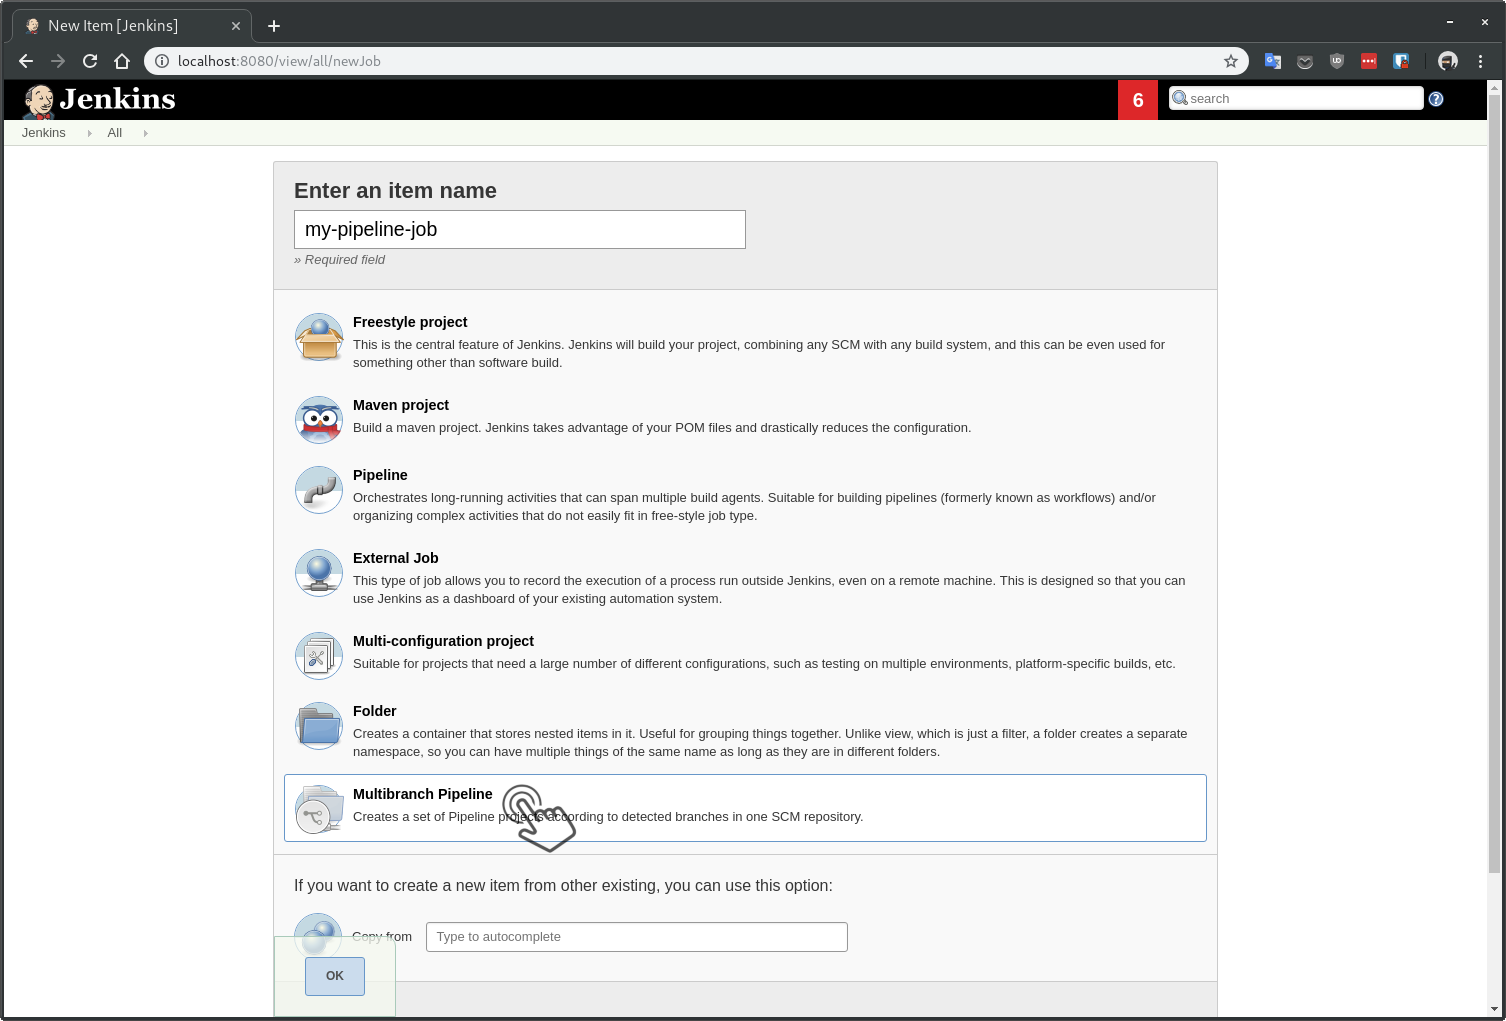
Pipeline job type lets you either paste a Jenkinsfile directly into the job config or reference a single git repository as the source then specify single branch where the Jenkinsfile is located. It is rarely the case where you want to use this job type, it’s better to be avoided.
Multibranch Pipeline job type lets you define a job where from a single git repository Jenkins will detect multiple branches and create nested jobs when it finds a Jenkinsfile. This is the best way of using Jenkins pipelines.
Defining Jenkinsfile source
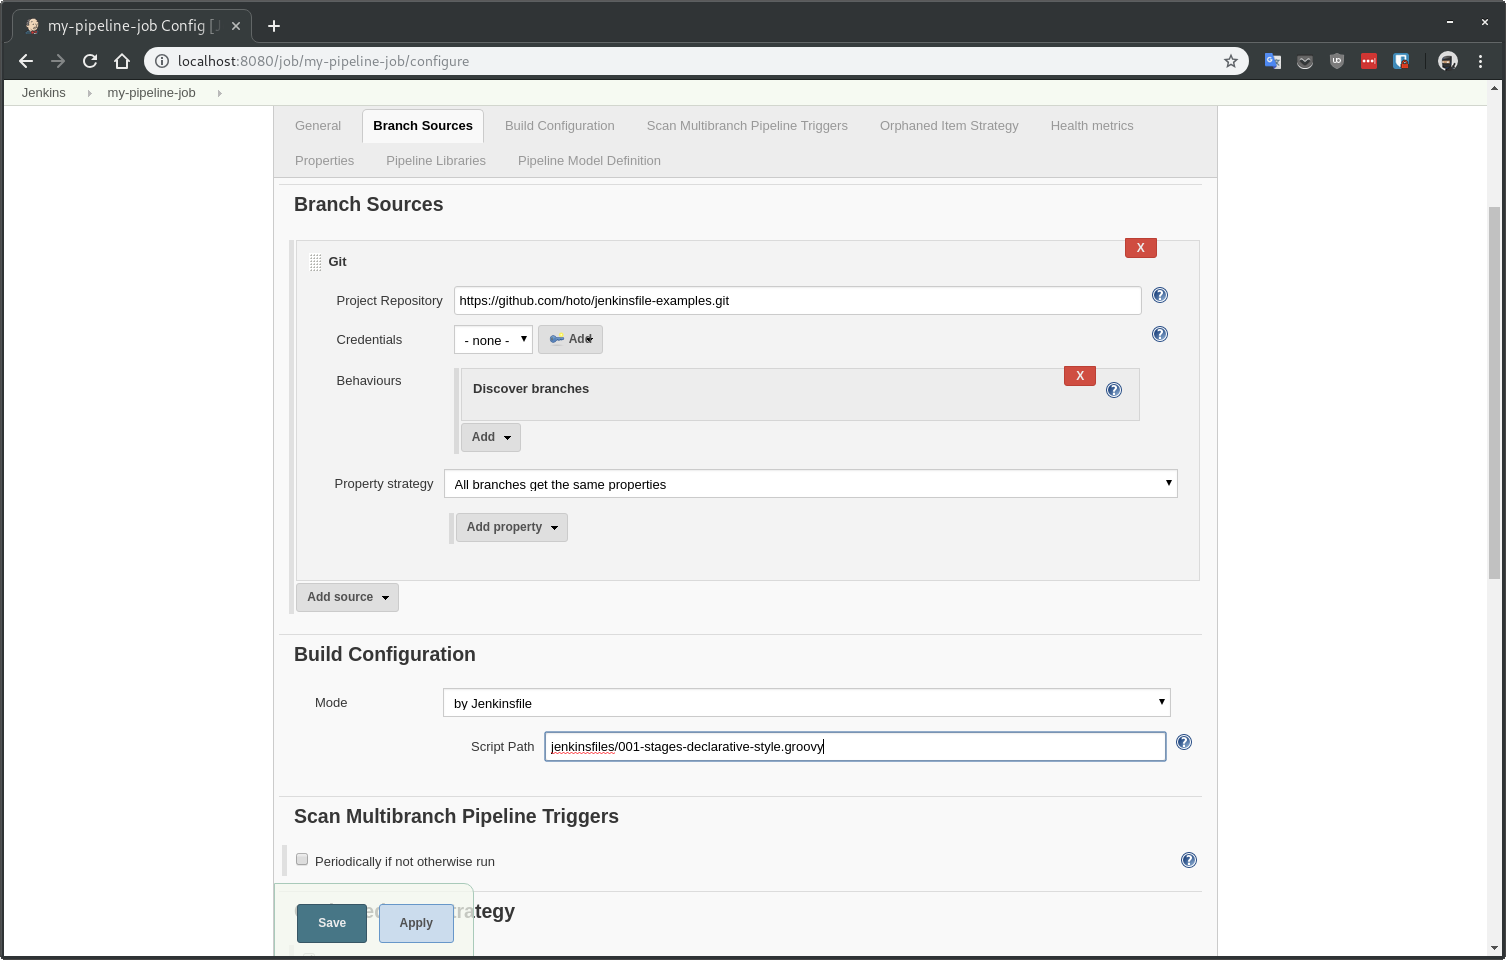
Add a Git source and provide the https://github.com/hoto/jenkinsfile-examples.git repository link.
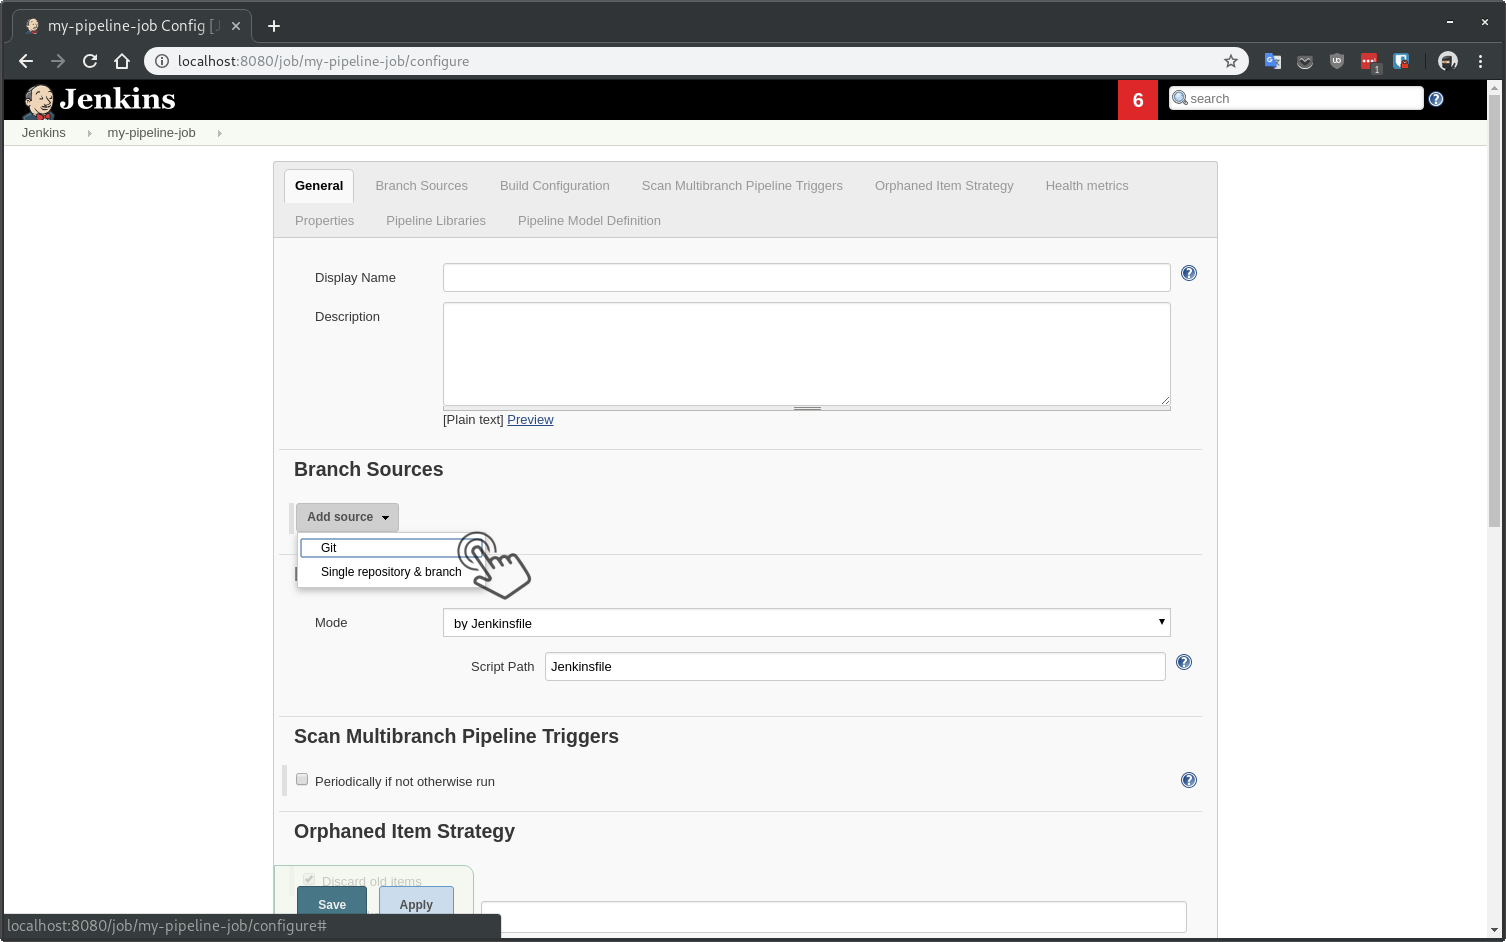

Default place where Jenkins is looking for a Jenkinsfile is the root of the project with Jenkinsfile as the filename.
Jenkinsfile can be put in any directory and the filename can be whatever you want. But I would follow the default convention of using the root of the project and the Jenkinsfile as the filename unless you have a good reason not to.
One Jenkins job can only reference a single Jenkinsfile. If you have more Jenkinsfiles in your repository you will have to create a Multibranch Pipeline job for each one of them.
Provide jenkinsfiles/001-stages-declarative-style.groovy as the Jenkinsfile Script Path. We could also specify a regex for only specific branches to be scanned but I prefer to scan and build all branches.
Jenkinsfile that we referenced is very simple and looks like this:
pipeline {
  agent any
  stages {
  stage('Stage 1') {
      steps {
        script {
          echo 'Stage 1'
        }
      }
    }
  stage('Stage 2') {
      steps {
        script {
          echo 'Stage 2'
        }
      }
    }
  }
}
Detecting changes by polling
Jenkins can be immediately notified by changes (e.g., new commits) in your repository by an external webhook, but if you don’t know how to set it up, you can always start with Jenkins polling your git repository and checking for new changes.
Activate Scan Multibranch Pipeline Triggers making Jenkins git fetch for new changes in 1-minute intervals. When new commits or branches are detected Jenkins will automatically start a build.
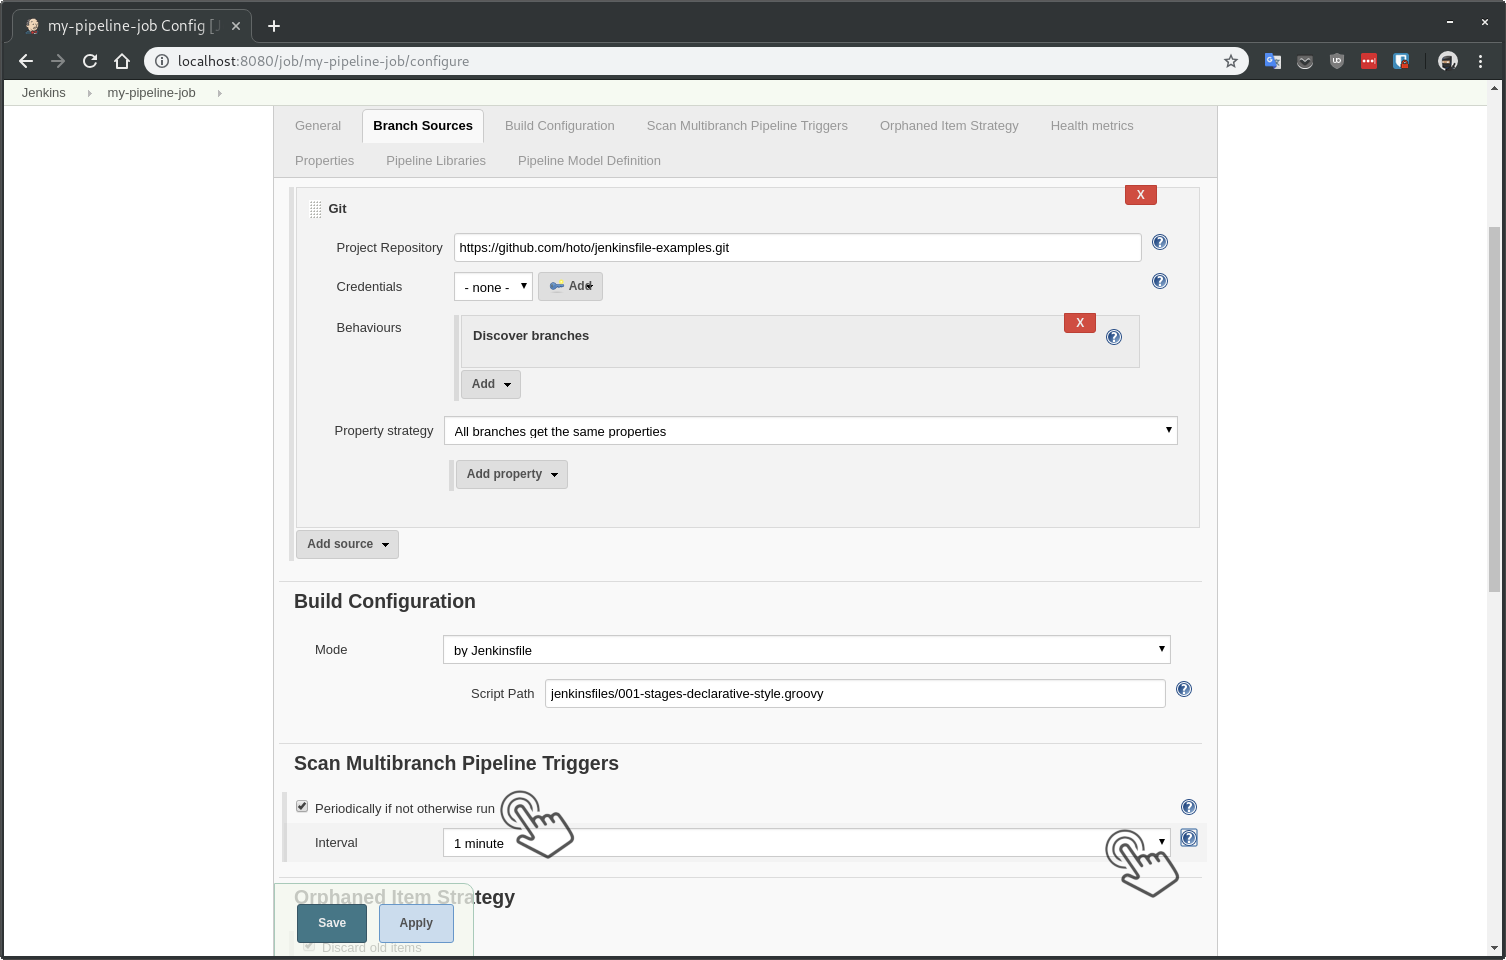
If you can then set up a webhook in your git hosting provider to notify Jenkins about new changes as it makes the build feedback loop for developers much faster.
Click on Save and Jenkins will start the first scan.
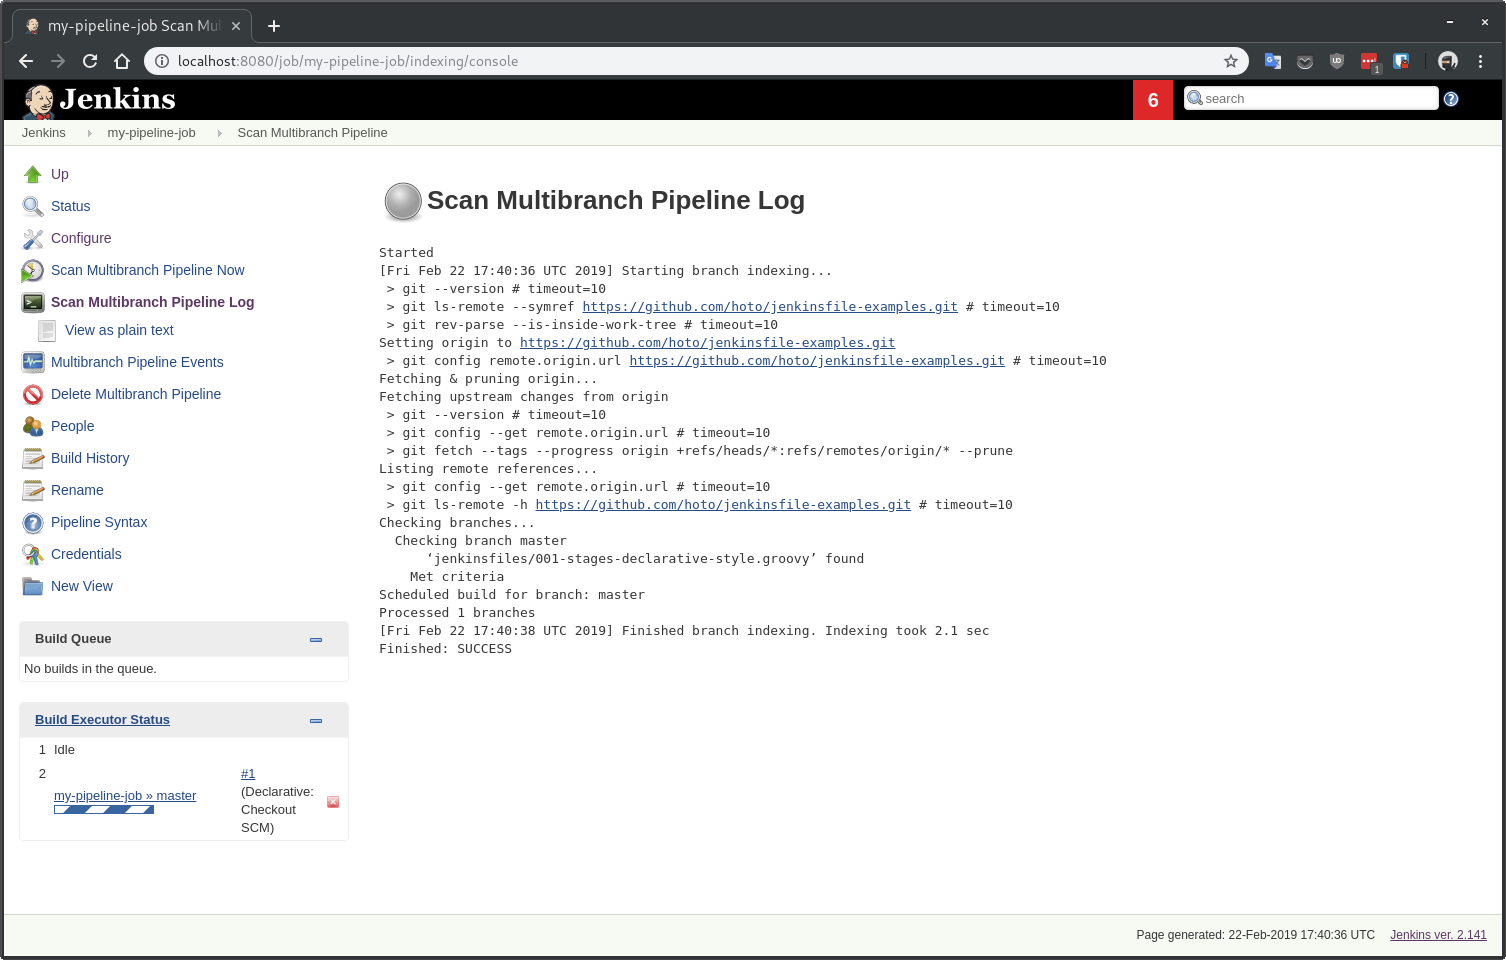
What happened is that Jenkins cloned the repository and looked in each branch for a Jenkinsfile. When it finds a match, it creates nested jobs for each branch and runs builds for them. In our current set up, Jenkins will do this cycle every minute.
At the time of writing this article, only master branch matches my job criteria. So only one job has been created.
Checking branches...
  Checking branch master
      ‘jenkinsfiles/001-stages-declarative-style.groovy’ found
    Met criteria
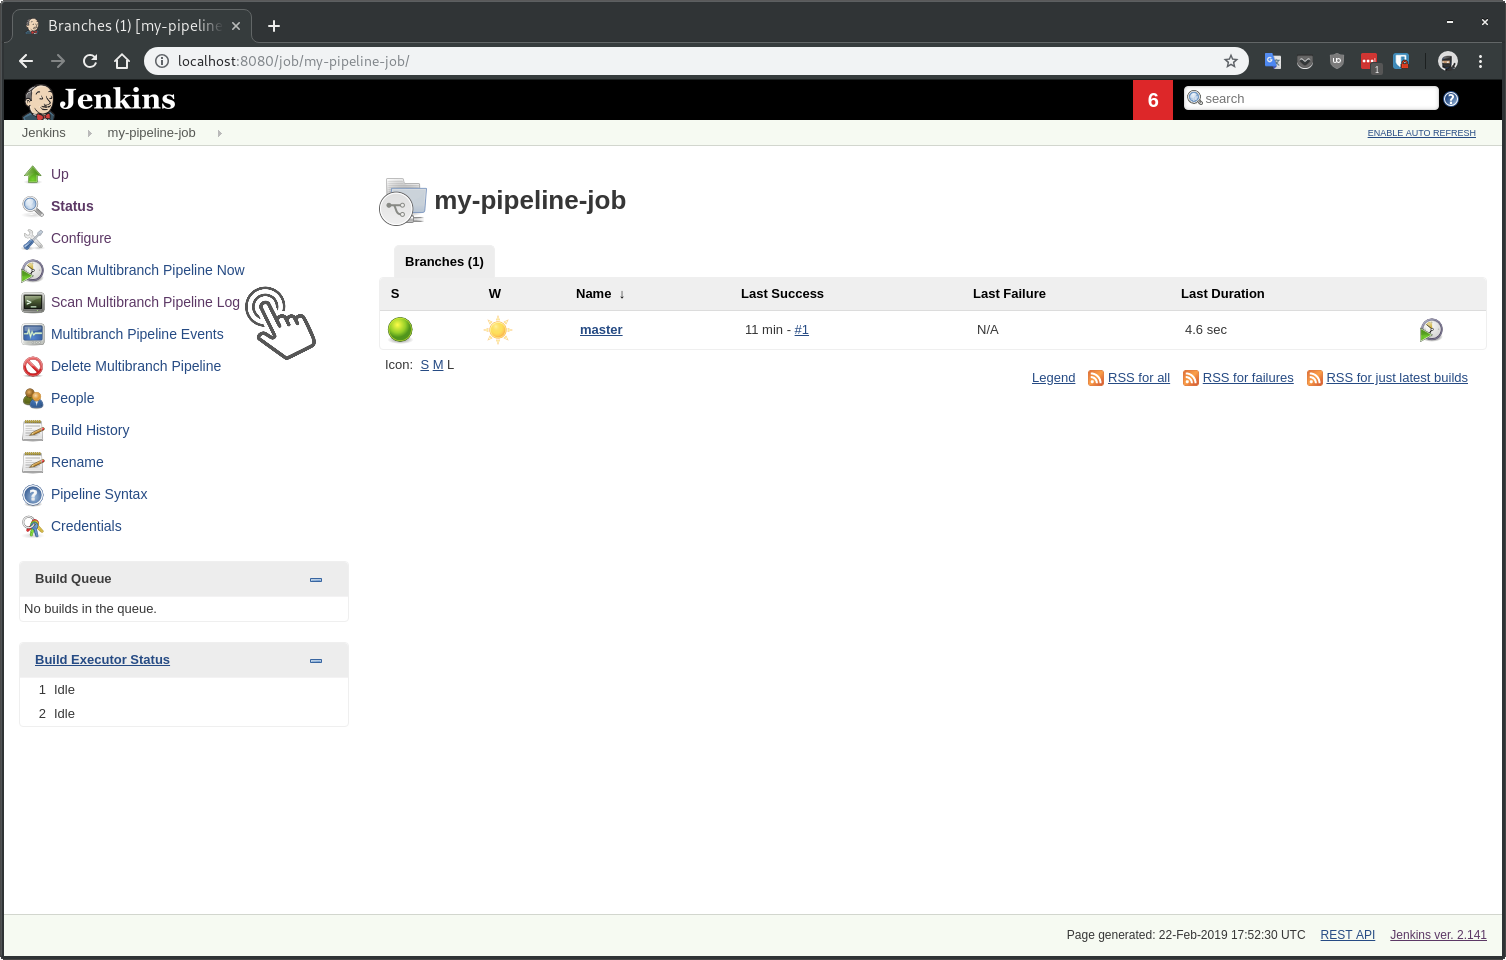
Nested jobs
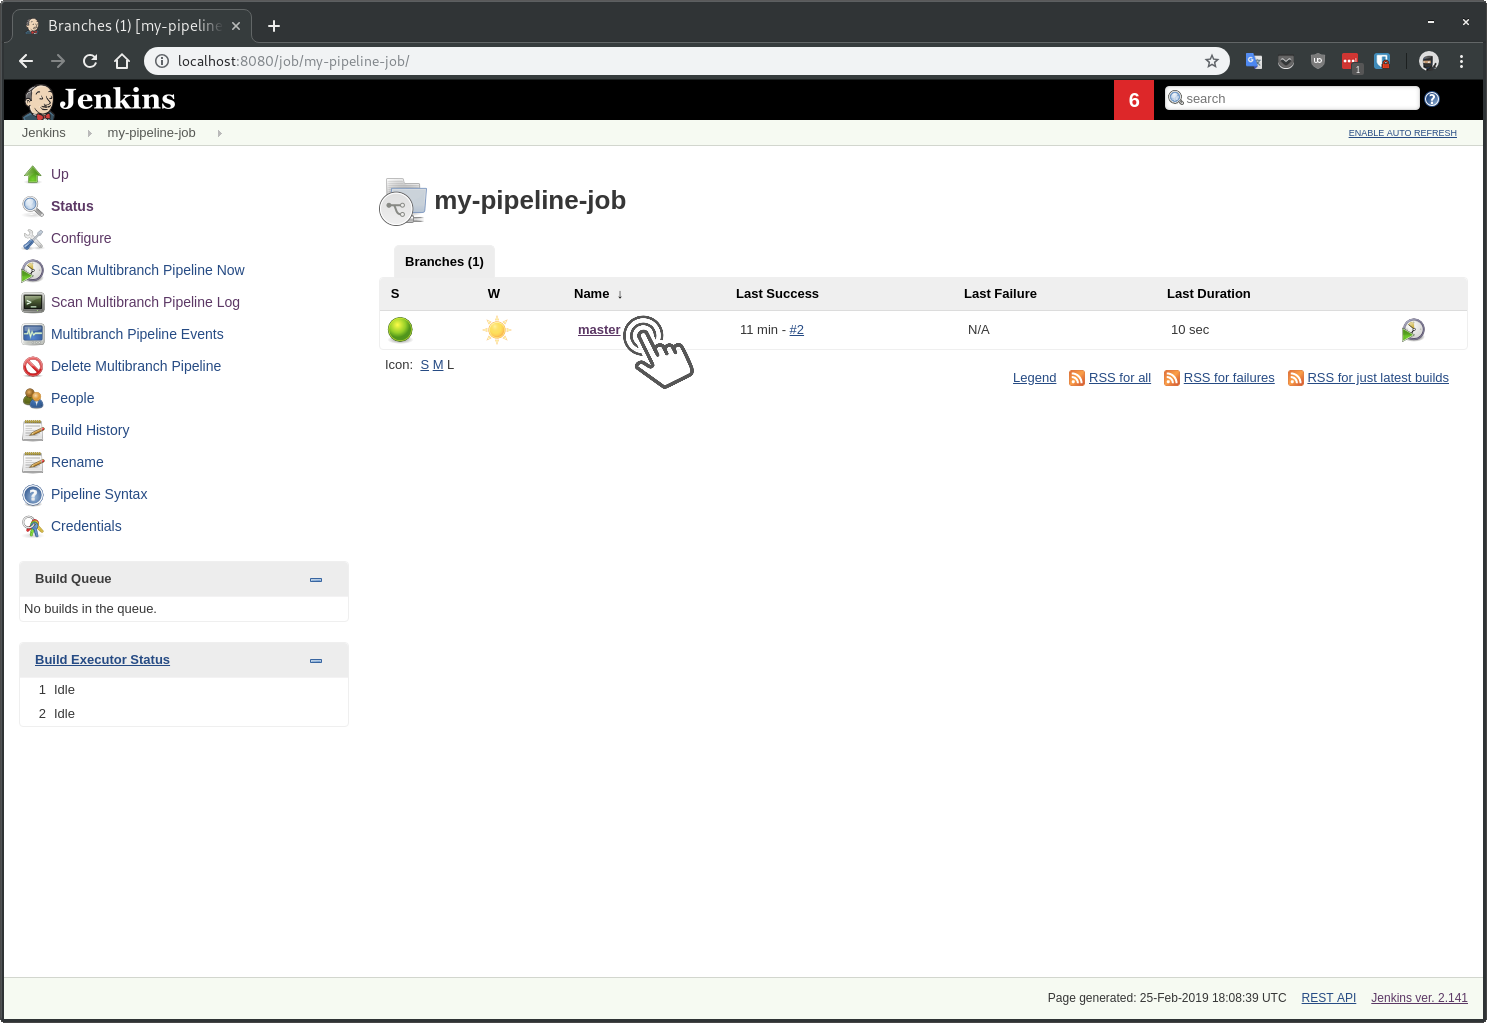
Let’s have a look at what Jenkins created.
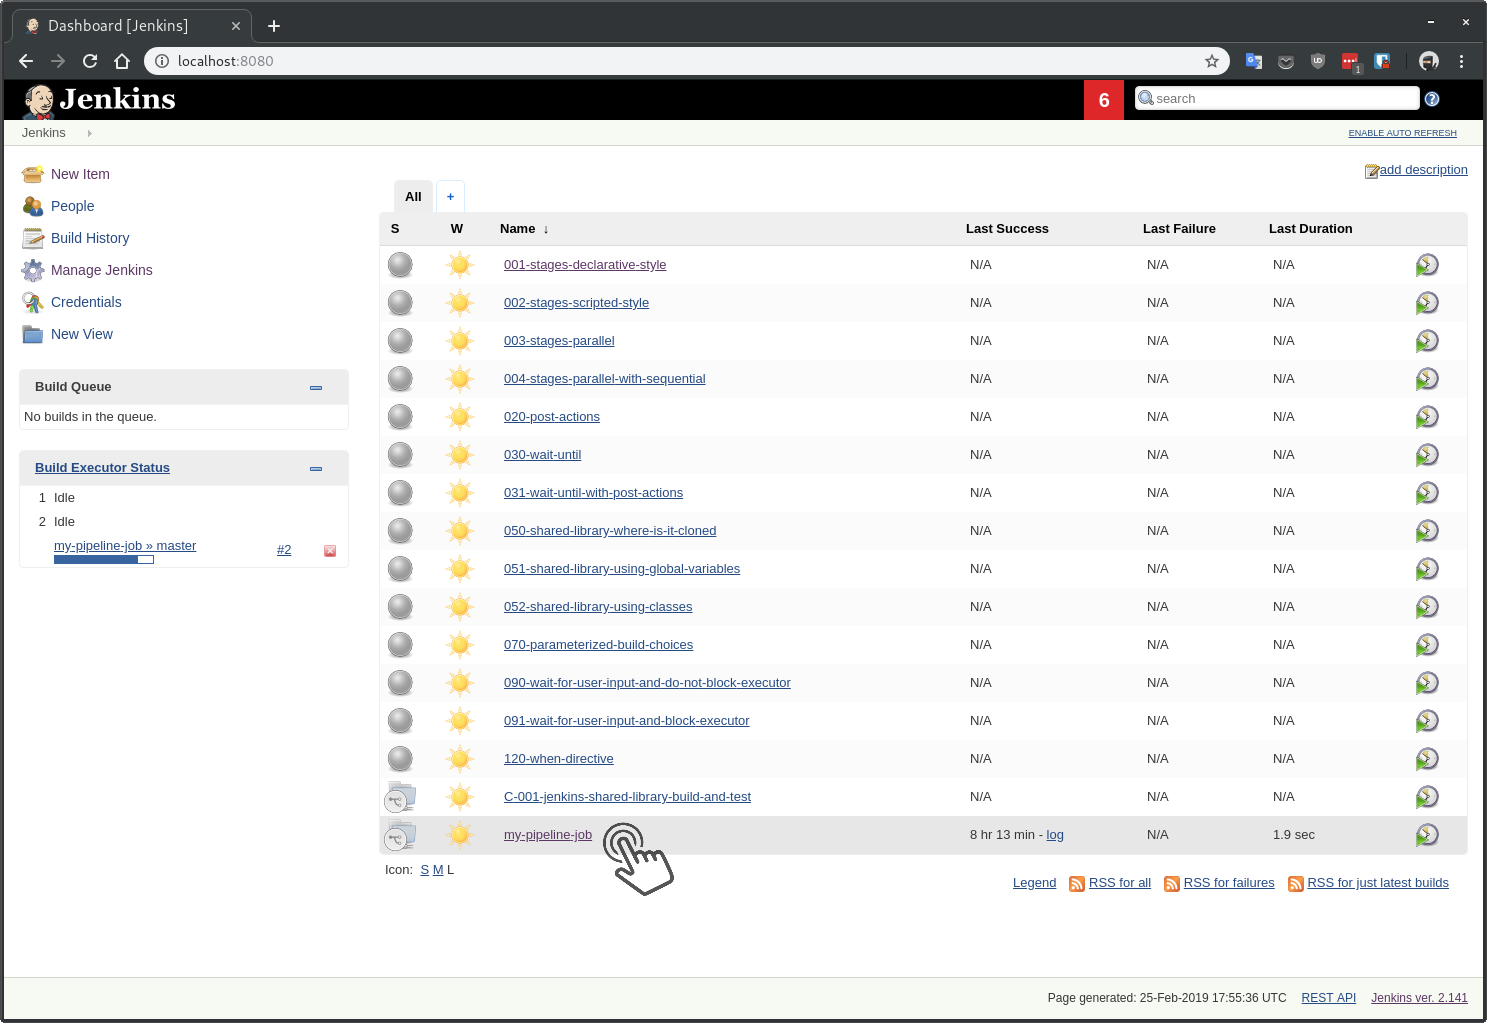
Go back to Jenkins home and click on my-pipeline-job.
If you ever have problems with jobs for branches not being created or built automatically check the Scan Multibranch Pipeline Log.
This is the same log view we saw before but logs are going to be refreshed every minute or when someone clicks on the Scan Multibranch Pipeline Now link.
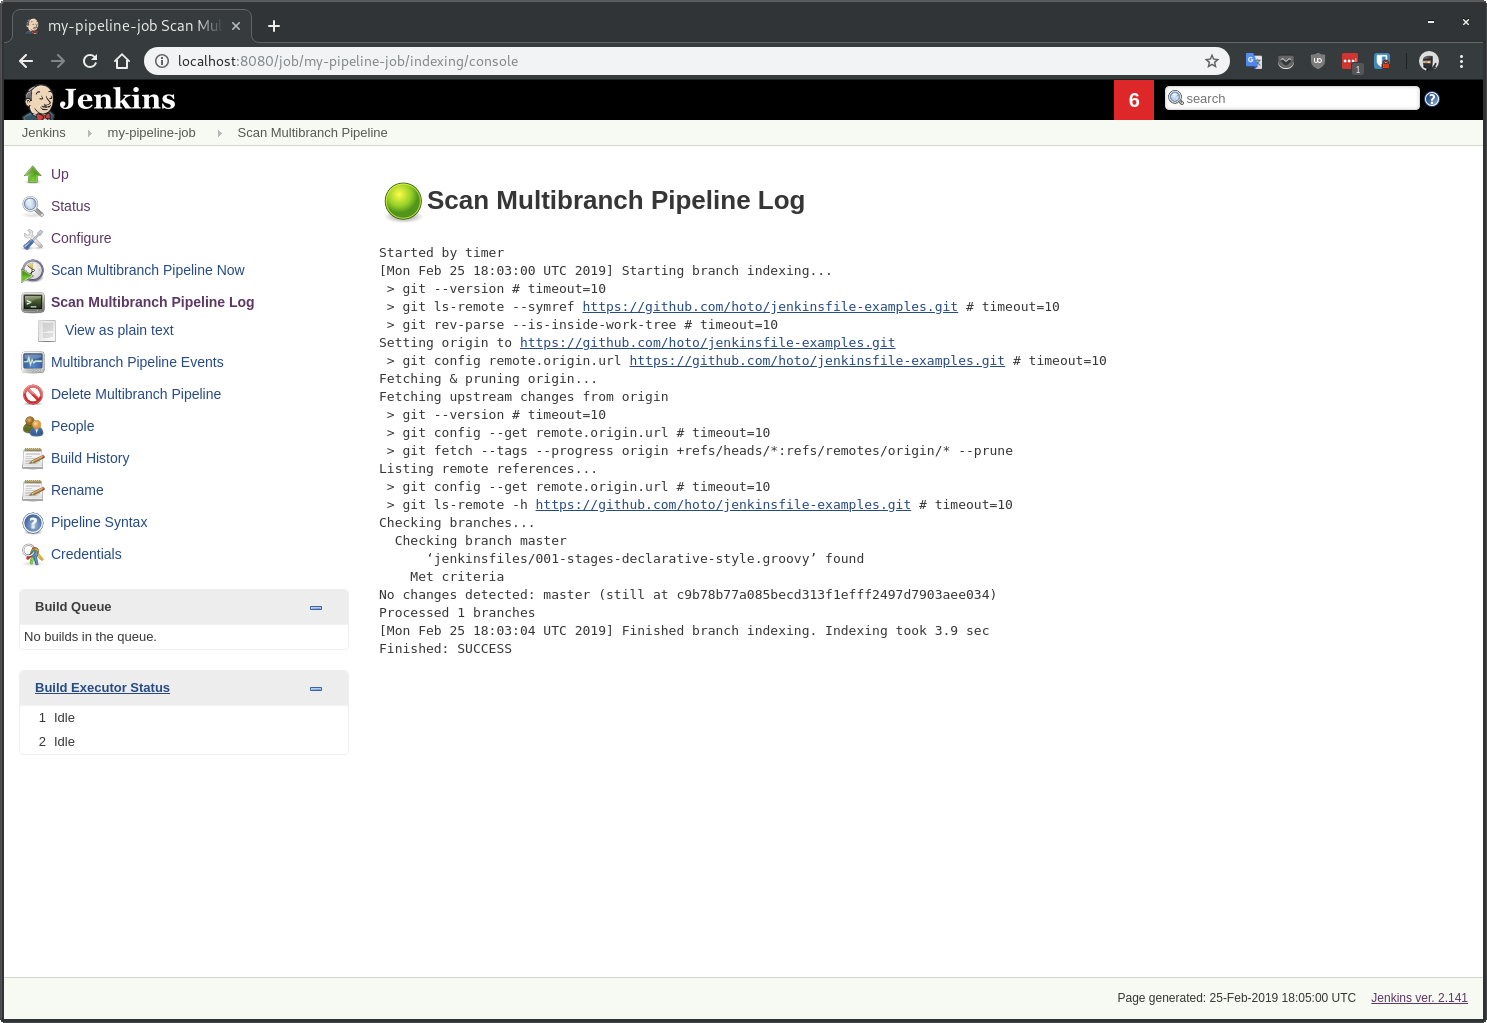
From my experience, this view is the best way to debug issues with multibranch pipelines. If you ever see a timeout on a git command, it usually means Jenkins can’t access the git repository.
Following log tells us that only 1 branch has been detected and Jenkins already have a build for the commit on that branch.
No changes detected: master (still at c9b78b77a085becd313f1efff2497)
Processed 1 branches
Go back to nested jobs view and click on the job for the master branch.
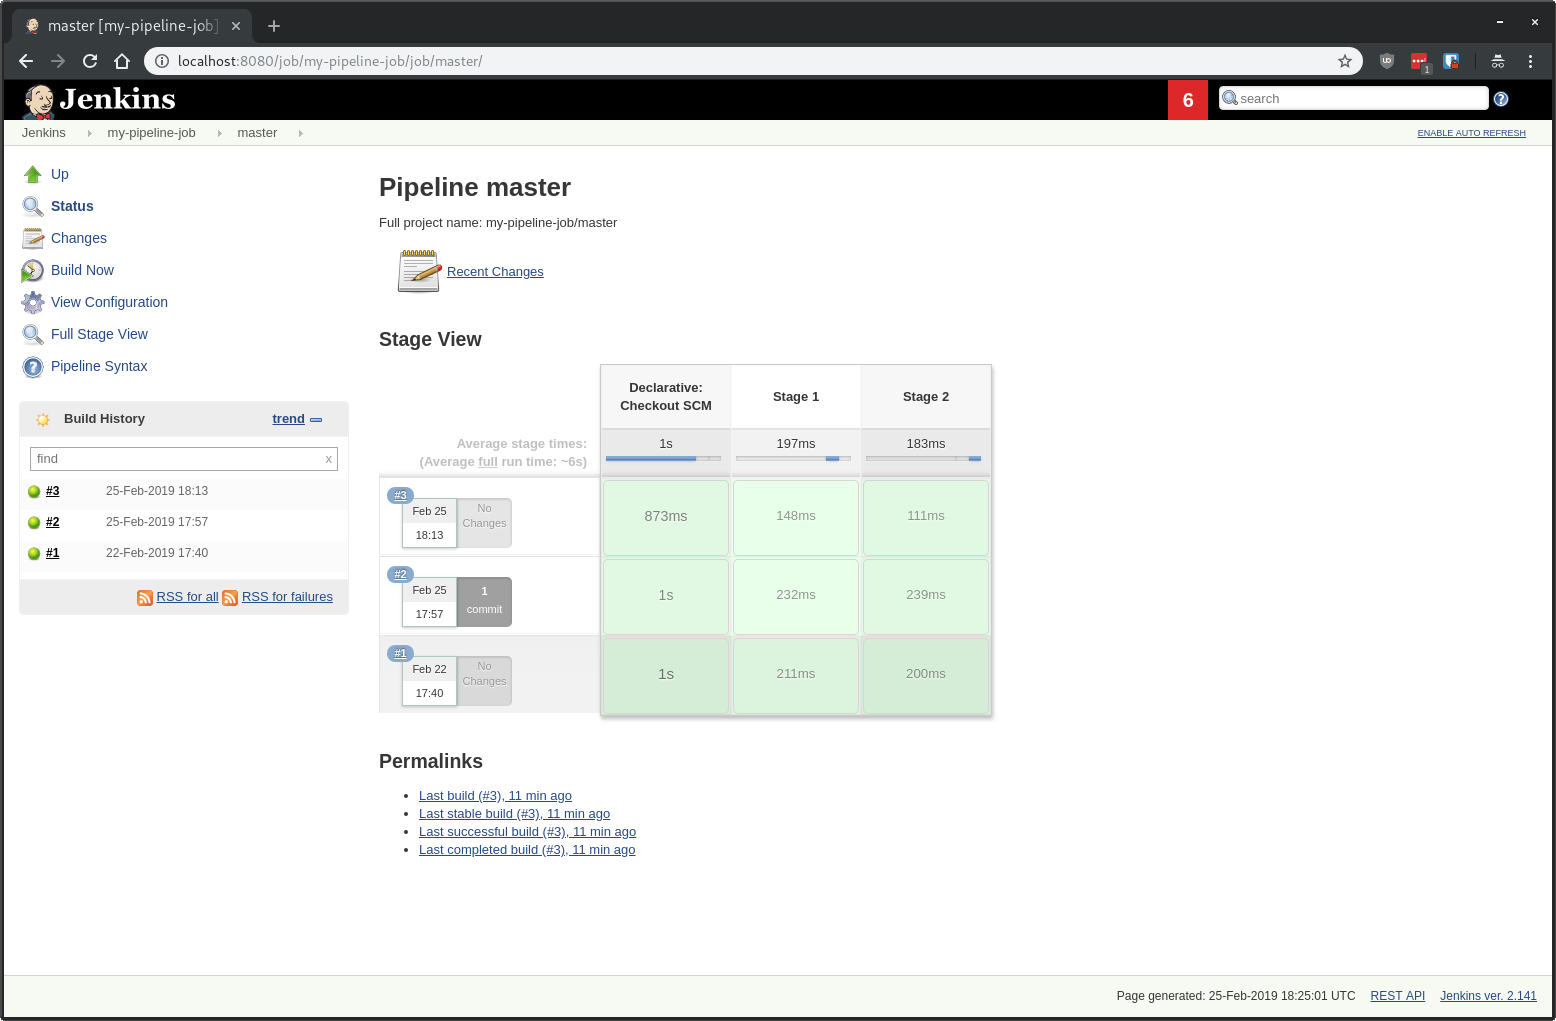
If the referenced git repository never changes, then no build will be ever run again. If you want to, you can always trigger a build manually by clicking on the Build Now link. This is useful when the build fails for random reasons.
Automatic branch detection
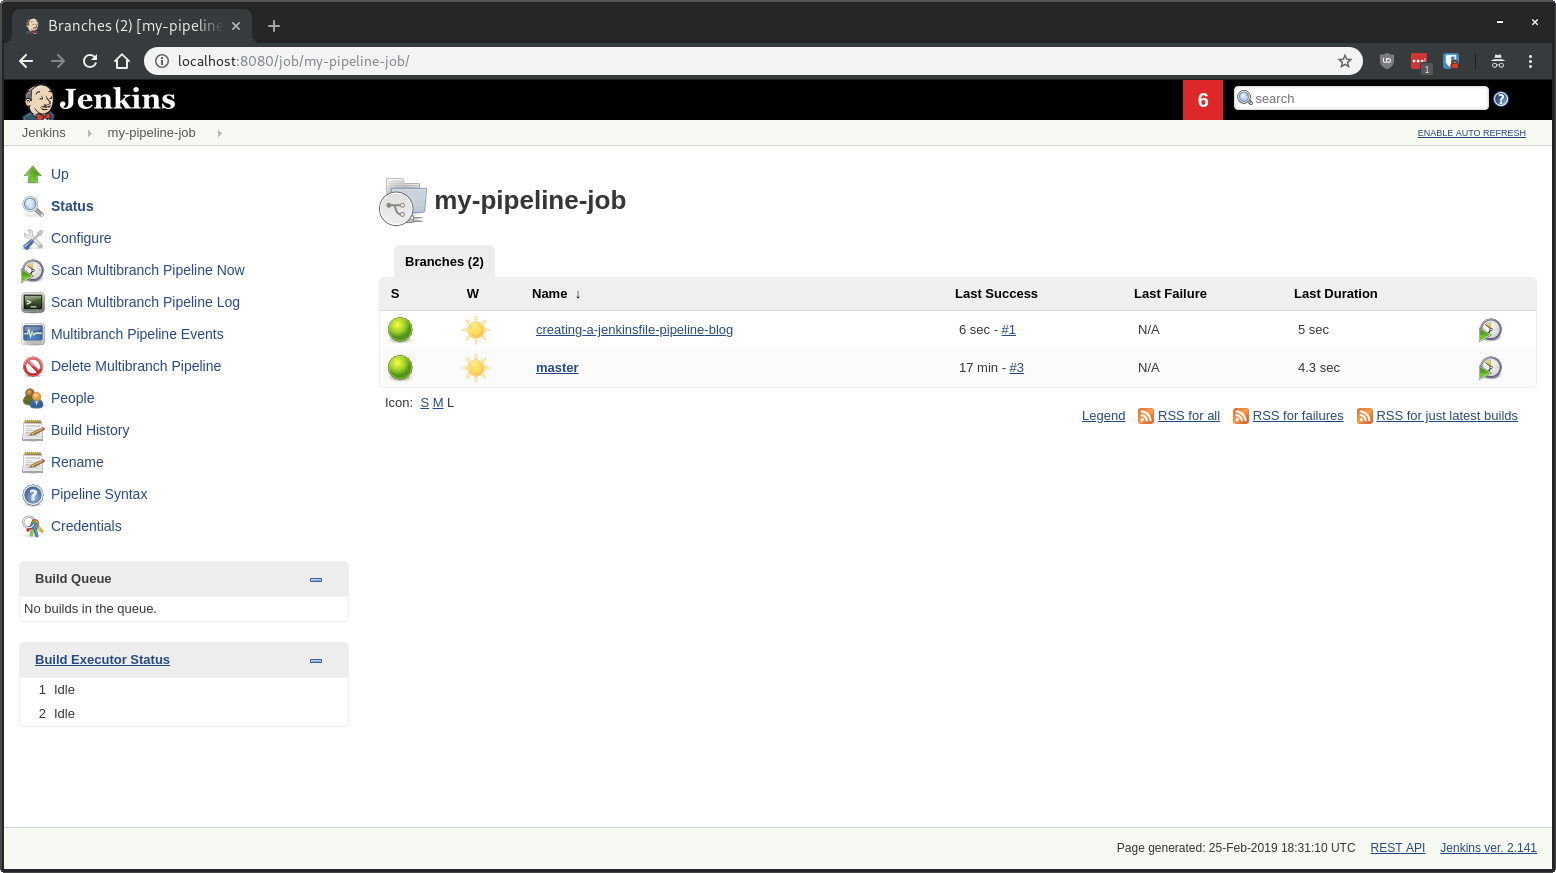
For the sake of this tutorial, I’m going to create a new branch and push it to the repository so we can test if a new nested job is created.

After a minute a new job for creating-a-jenkins-pipeline-blog branch has been automatically created.
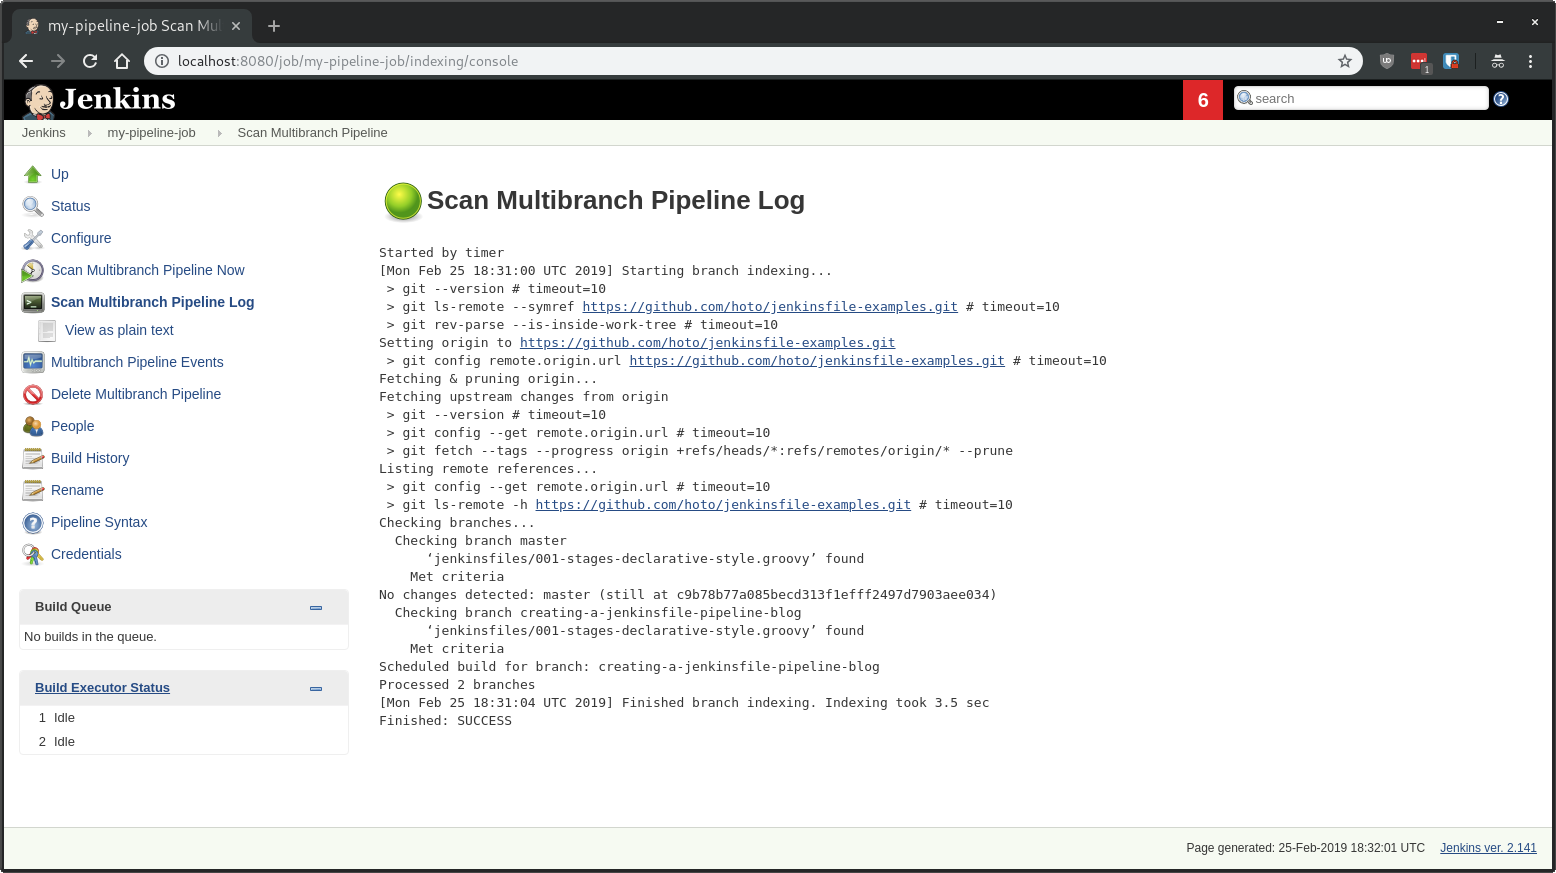
From the logs, we can see that Jenkins detected new branch matching pipeline criteria and scheduled a build for it.
Started by timer
[...]
Checking branches...
  Checking branch master
      ‘jenkinsfiles/001-stages-declarative-style.groovy’ found
    Met criteria
No changes detected: master (still at c9b78b77a085becd313f1efff249)
  Checking branch creating-a-jenkinsfile-pipeline-blog
      ‘jenkinsfiles/001-stages-declarative-style.groovy’ found
    Met criteria
Scheduled build for branch: creating-a-jenkinsfile-pipeline-blog
Processed 2 branches
That’s it! Next steps would be to create a webhook for instantaneous builds and modifying the Jenkinsfile to do something useful like build and deploy your application.