
- By Christian Panadero Martinez
- ·
- Posted 14 May 2018
Algebraic data types and their algebra
When we think about types we usually think about how they can help us to abstract concepts. In this post we will learn how we can think about types..

Scala can be used to build Android applications, as an alternative to Java or Kotlin. Unlike them, setting up an Android project in Scala with SBT is not straightforward, and can give us some headaches to get it right. To show how this can be done, we are going to create new project template using the Android SDK Plugin for SBT.
In order to develop Android apps in Scala, you need a minimum set of tools: SBT and Android SDK.
You can install SBT on Mac OSX using Homebrew.
$ brew install sbt
To install SBT on other operating systems, you can follow the instructions on the official documentation.
You can just download the latest version of the Android SDK from the Developer website and follow the installation instructions. Alternatively, you can install Android Studio, which comes with the Android SDK and emulators.
On Mac OSX/Linux, you can just export the variable
$ export ANDROID_HOME=path_to_your_android_sdk
or add it to your bash_rc or bash_profile.
NOTE: On Mac OSX, if Android Studio is installed, the Android SDK is usually located at /Users/your_user_name/Library/Android/sdk/
The easiest way to install the Android SDK Plugin for SBT is to do it globally. For this, you'll need to create a file in the SBT plugins folder:
~/.sbt/0.13/plugins/android.sbt
and add the following line:
addSbtPlugin("org.scala-android" % "sbt-android" % "1.7.0")
Let's create a folder for our Android project:
$ mkdir my-project
$ cd my-project
Now, we are going to use the SBT plugin to create a template project. First, run SBT:
$ sbt
Then, use the plugin to create the project.
> gen-android <package_name> <project_name>
For example:
> gen-android com.codurance scala_on_android
The project structure created looks like this:
my-project/
|-- project/
|   |-- android.sbt
|   |-- build.properties
|-- src/
|   |-- androidTest/
|       |-- java/
|           |-- com/
|               |-- codurance/
|                   |-- Junit3MainActivityTest.java
|                   |-- Junit4MainActivityTest.java
|   |-- main/
|       |-- res/
|           // Android resorces folders
|       |-- scala/
|           |-- com/
|               |-- codurance/
|                   |-- MainActivity.scala
|       |-- AndroidManifest.xml
|-- build.sbt
|-- lint.xml
The SBT plugin creates a project structure with the minimum files needed to run an Android project, plus a setup for running instrumentation tests. Notice that the test classes generated are in Java, and the MainActivity is in Scala.
The most interesting file is build.sbt. I've added some comments to explain what's the purpose of each line.
// Version of the Scala runtime
scalaVersion := "2.11.8"

// Use the Android plugin
enablePlugins(AndroidApp)
// Add support for vector drawables
useSupportVectors

// Android version code (Same as versionCode on Gradle projects)
versionCode := Some(1)
// Android version name (Same as versionName on Gradle projects)
version := "0.1-SNAPSHOT"

// Instrumentation tests runner (Same as testInstrumentationRunner on Gradle projects)
instrumentTestRunner :=
  "android.support.test.runner.AndroidJUnitRunner"

// Android platform target (Same as targetSdkVersion on Gradle projects)
platformTarget := "android-24"

// Java compile options
javacOptions in Compile ++= "-source" :: "1.7" :: "-target" :: "1.7" :: Nil

// Libraries
libraryDependencies ++=
  "com.android.support" % "appcompat-v7" % "24.0.0" ::
  "com.android.support.test" % "runner" % "0.5" % "androidTest" ::
  "com.android.support.test.espresso" % "espresso-core" % "2.2.2" % "androidTest" ::
  Nil
We don't even need to use the SBT plugin to generate this template. If we prefer to craft our own minimum project, we could just create the project structure for SBT and Android manually, and add only the setup that we need.
You will need to have an connected Android device or an running emulator.
Once this is done, the final step is to run the application from sbt:
> android:run
You can also run it from the terminal, instead of from SBT:
$ sbt android:run
There are other interesting options that can be included in the build.sbt file. A few of them are:
// Application name
name := "scala_on_android"
// Min Android SDK version supported
minSdkVersion := "15"
// Override 'android:run', to use just 'run' instead
run <<= run in Android
From this point, you could develop your Android apps in Scala using a text editor and sbt. But it would be good to be able to use the official IDE, which offers a lot of useful tools. It's also possible to use IntelliJ, but I won't go into this detail in this post.
Before we start, we'll need to install both the Scala and SBT plugins for Android Studio.
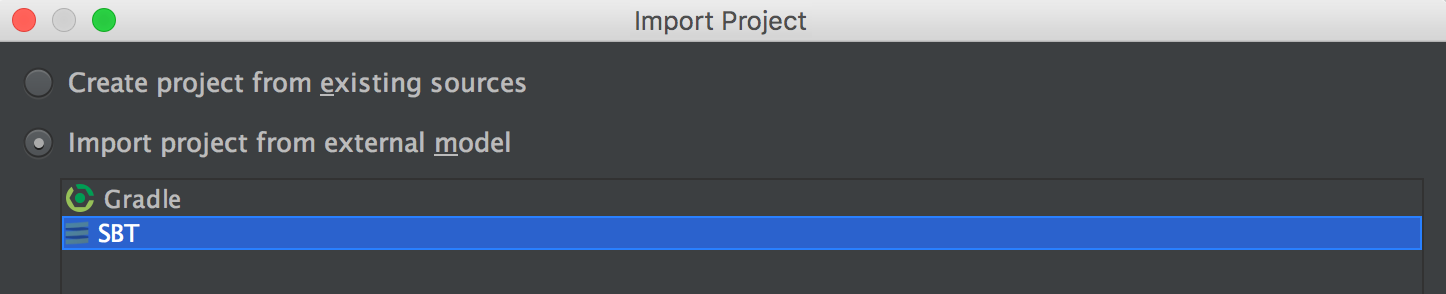
To import our project, open Android Studio and select Import project (Eclipse, ADT, Gradle, etc.).
Select Import project from external module, and SBT:
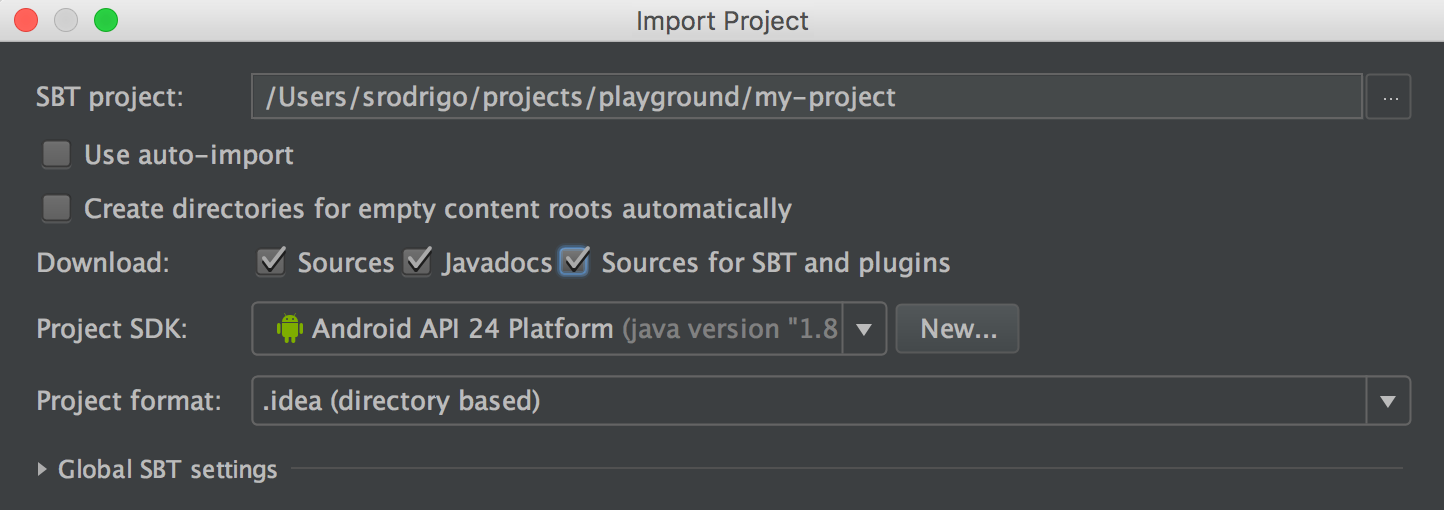
Select your Android SDK on the Project SDK option, and check Sources, Javadocs and Sources for SBT and plugins:
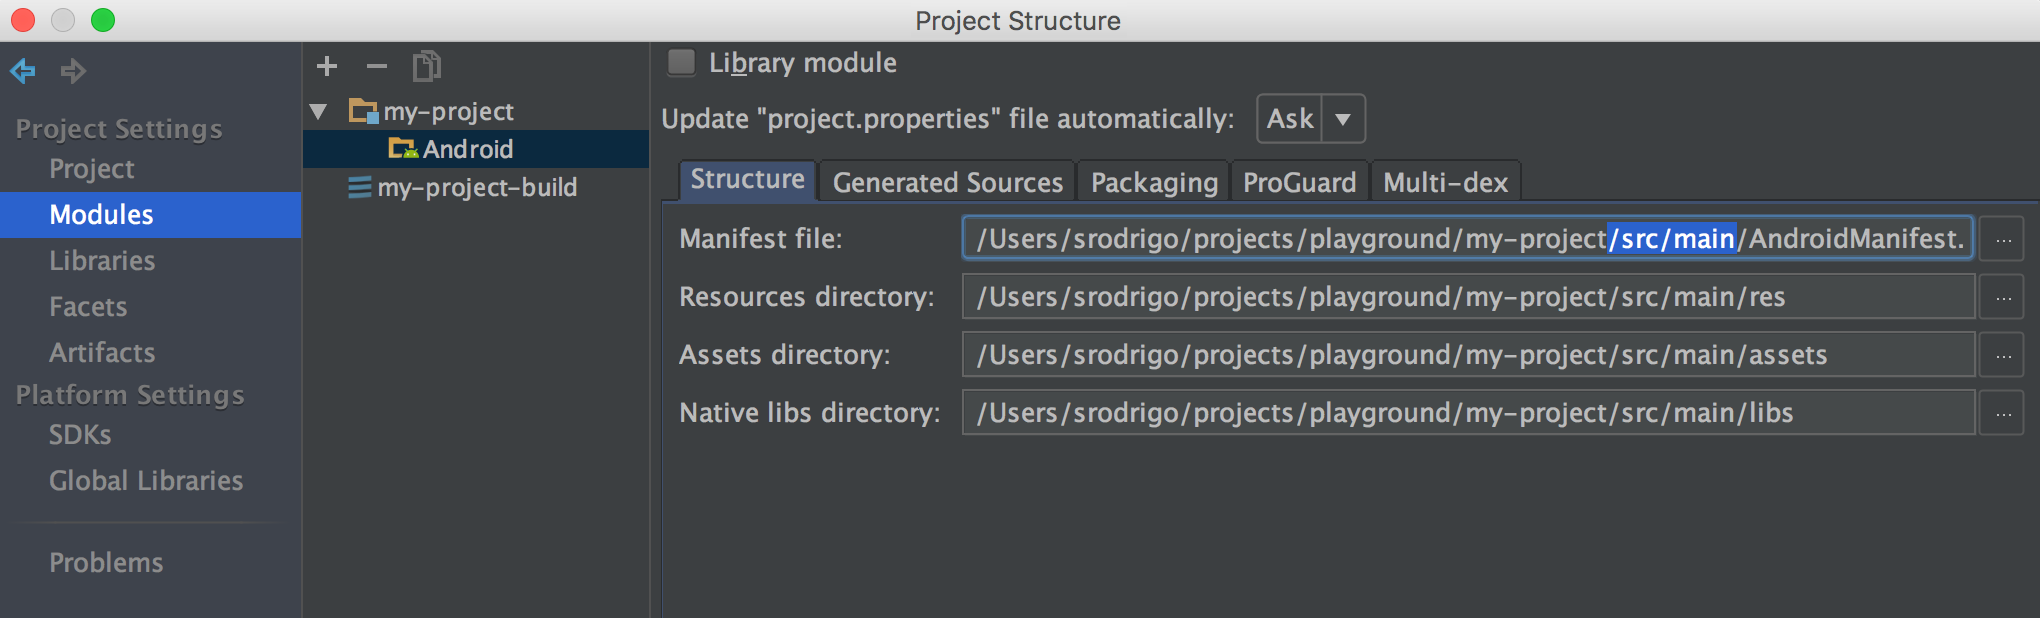
On Project Settings/Modules select the project module and click on +, and Add Android under the Framework section. On the Structure tab, replace all /.idea/modules paths with /src/main:
Now that the project is set up, we can try to run it. Create a new Run/Debug Configuration. Select Android App and give it a name (e.g. app).
On the General tab, select the Module. We also need to configure how to run the app with SBT. On the Before launch section, remove the default Gradle-aware Make task clicking on -:

Finally, click on +, create a new SBT task, and add android:run. Leave the Run in current module option checked:

From now, you can run the application in the same way as any app written in Java or Kotlin.
Kotlin still looks like a better fit for Android: Among other benefits, it has an easier setup, better IDE support and smaller runtime. However, the possibility of using Scala and SBT can allow developers who build their backends in Scala or want to use high level Functional Programming features to build complex apps.

